Analog In, Out Serial
This example shows you how to read an analog input pin, map the result to a range from 0 to 255, use that result to set the pulse width modulation (PWM) of an output pin to dim or brighten an LED and print the values on the serial monitor of the Arduino Software (IDE).
Hardware Required
Arduino Board
Potentiometer
Red LED
220 ohm resistor
Circuit

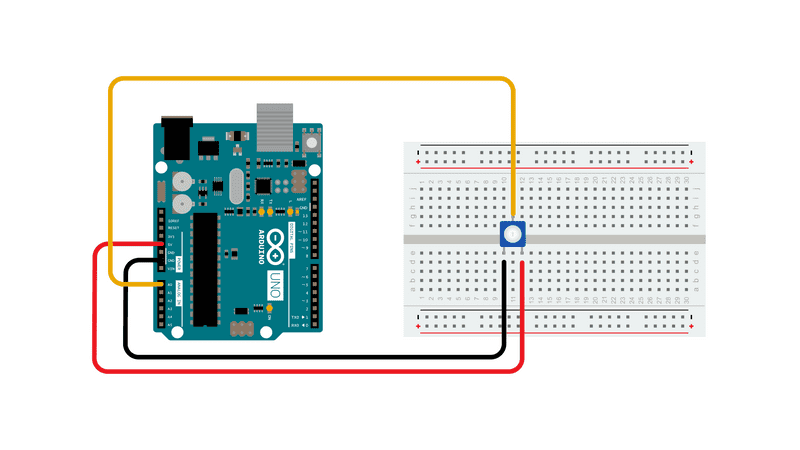
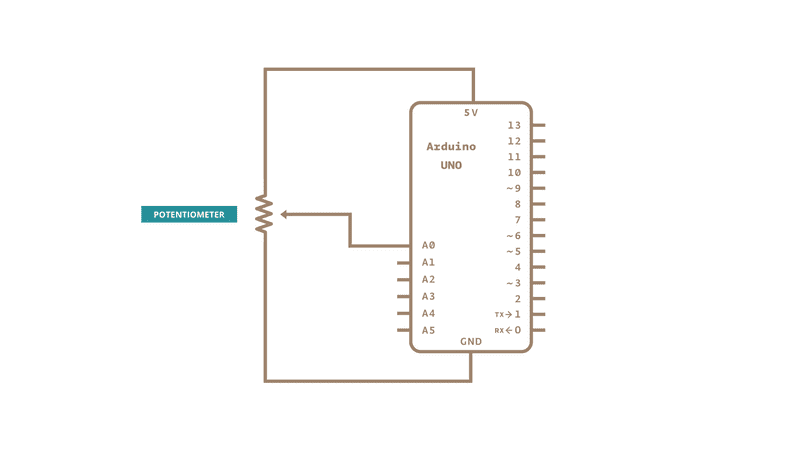
Connect one pin from your pot to 5V, the center pin to analog pin 0 and the remaining pin to ground. Next, connect a 220 ohm current limiting resistor to digital pin 9, with an LED in series. The long, positive leg (the anode) of the LED should be connected to the output from the resistor, with the shorter, negative leg (the cathode) connected to ground.
Schematic

Code
In the sketch below, after declaring two pin assignments (analog 0 for our potentiometer and digital 9 for your LED) and two variables, sensorValue and outputValue, the only things that you do in the setup() function is to begin serial communication.
Next, in the main loop, sensorValue is assigned to store the raw analog value read from the potentiometer. Arduino has an analogRead range from 0 to 1023, and an analogWrite range only from 0 to 255, therefore the data from the potentiometer needs to be converted to fit into the smaller range before using it to dim the LED.
In order to convert this value, use a function called map():
outputValue = map(sensorValue, 0, 1023, 0, 255);
outputValue is assigned to equal the scaled value from the potentiometer. map() accepts five arguments: The value to be mapped, the low range and high values of the input data, and the low and high values for that data to be remapped to. In this case, the sensor data is mapped down from its original range of 0 to 1023 to 0 to 255.
The newly mapped sensor data is then output to the analogOutPin dimming or brightening the LED as the potentiometer is turned. Finally, both the raw and scaled sensor values are sent to the Arduino Software (IDE) serial monitor window, in a steady stream of data.
/*

  Analog input, analog output, serial output

  Reads an analog input pin, maps the result to a range from 0 to 255 and uses

  the result to set the pulse width modulation (PWM) of an output pin.

  Also prints the results to the Serial Monitor.

  The circuit:

  - potentiometer connected to analog pin 0.

    Center pin of the potentiometer goes to the analog pin.

    side pins of the potentiometer go to +5V and ground

  - LED connected from digital pin 9 to ground

  created 29 Dec. 2008

  modified 9 Apr 2012

  by Tom Igoe

  This example code is in the public domain.

  http://www.arduino.cc/en/Tutorial/AnalogInOutSerial

*/

// These constants won't change. They're used to give names to the pins used:

const int analogInPin = A0;  // Analog input pin that the potentiometer is attached to

const int analogOutPin = 9; // Analog output pin that the LED is attached to

int sensorValue = 0;        // value read from the pot
int outputValue = 0;        // value output to the PWM (analog out)

void setup() {

  // initialize serial communications at 9600 bps:

  Serial.begin(9600);
}

void loop() {

  // read the analog in value:

  sensorValue = analogRead(analogInPin);

  // map it to the range of the analog out:

  outputValue = map(sensorValue, 0, 1023, 0, 255);

  // change the analog out value:

  analogWrite(analogOutPin, outputValue);

  // print the results to the Serial Monitor:

  Serial.print("sensor = ");

  Serial.print(sensorValue);

  Serial.print("\t output = ");

  Serial.println(outputValue);

  // wait 2 milliseconds before the next loop for the analog-to-digital

  // converter to settle after the last reading:

  delay(2);
}
See Also:
map()
serial()
AnalogInput - Use a potentiometer to control the blinking of an LED.
AnalogWriteMega - Fade 12 LEDs on and off, one by one, using an Arduino Mega board.
Calibration - Define a maximum and minimum for expected analog sensor values.
Fading - Use an analog output (PWM pin) to fade an LED.
Smoothing - Smooth multiple readings of an analog input.
Last revision 2015/07/28 by SM