GSM Scan Networks
This example prints out the IMEI number of the modem, then checks to see if it's connected to a carrier and prints out its signal strength. It also scans for all nearby networks.
Hardware Required
Arduino Board
SIM card enable for Data
Circuit

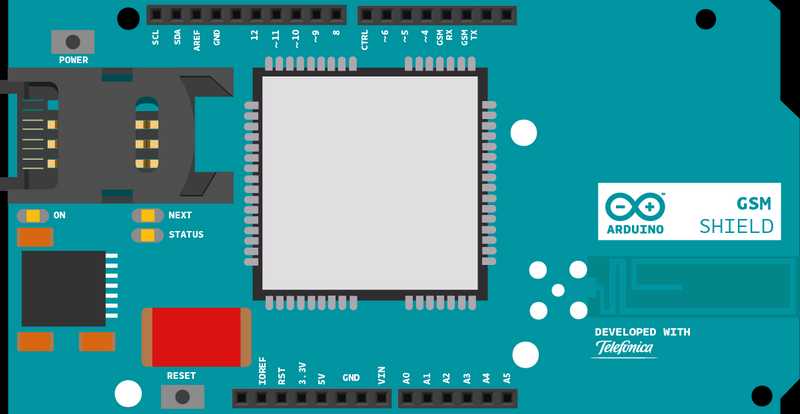
image of the Arduino GSM Shield on top of an Arduino board
Code
First, import the GSM library
#include <GSM.h>
SIM cards may have a PIN number that enables their functionality. Define the PIN for your SIM. If your SIM has no PIN, you can leave it blank :
#define PINNUMBER ""
Initialize instances of the classes you're going to use. You're going to need the GSM, GSMScanner, and GSMModem classes.
GSM gsmAccess;

GSMScanner scannerNetworks;

GSMModem modemTest;
Create a variable to hold the IMEI number, and a status messages to send to the serial monitor:
String IMEI = "";

String errortext = "ERROR";
In setup, open a serial connection to the computer. After opening the connection, send a message to the Serial Monitor indicating the sketch has started. Call @scannerNetworks.begin()@@ to reset the modem.
void setup(){

  Serial.begin(9600);

  Serial.println("GSM networks scanner");

  scannerNetworks.begin();
Create a local variable to track the connection status. You'll use this to keep the sketch from starting until the SIM is connected to the network :
boolean notConnected = true;Connect to the network by calling gsmAccess.begin(). It takes the SIM card's PIN as an argument. By placing this inside a while() loop, you can continually check the status of the connection. When the modem does connect, gsmAccess() will return GSM_READY. Use this as a flag to set the notConnected variable to true or false. Once connected, the remainder of setup will run.
while(notConnected)

  {

    if(gsmAccess.begin(PINNUMBER)==GSM_READY)

      notConnected = false;

    else

    {

      Serial.println("Not connected");

      delay(1000);

    }

  }
Get the IMEI of the modem with modemTest.getIMEI() and print it out to the serial monitor.
Serial.print("Modem IMEI: ");

  IMEI = modemTest.getIMEI();

  IMEI.replace("\n","");

  if(IMEI != NULL)

    Serial.println(IMEI);
In loop(), scan and print out all available networks. This may take some time
Serial.println("Scanning available networks. May take some seconds.");

  Serial.println(scannerNetworks.readNetworks());
Print out the current connected carrier, and the strength of the signal. Signal strength is on a scale of 0-31, where 0 is the lowest, and 31 is the highest. close the loop().
Serial.print("Current carrier: ");

  Serial.println(scannerNetworks.getCurrentCarrier());

  Serial.print("Signal Strength: ");

  Serial.print(scannerNetworks.getSignalStrength());

  Serial.println(" [0-31]");
Once your code is uploaded, open the serial monitor to see the status of the connection.
The complete sketch is below.
/*

 GSM Scan Networks

 This example prints out the IMEI number of the modem,

 then checks to see if it's connected to a carrier. If so,

 it prints the phone number associated with the card.

 Then it scans for nearby networks and prints out their signal strengths.

 Circuit:

 * GSM shield

 * SIM card

 Created 8 Mar 2012

 by Tom Igoe, implemented by Javier Carazo

 Modified 4 Feb 2013

 by Scott Fitzgerald

 http://www.arduino.cc/en/Tutorial/GSMToolsGsmScanNetworks

 This example code is part of the public domain

 */

// libraries
#include <GSM.h>

// PIN Number
#define PINNUMBER ""

// initialize the library instance

GSM gsmAccess;     // include a 'true' parameter to enable debugging

GSMScanner scannerNetworks;

GSMModem modemTest;

// Save data variables

String IMEI = "";

// serial monitor result messages

String errortext = "ERROR";

void setup() {

  // initialize serial communications and wait for port to open:

  Serial.begin(9600);

  while (!Serial) {

    ; // wait for serial port to connect. Needed for Leonardo only

  }

  Serial.println("GSM networks scanner");

  scannerNetworks.begin();

  // connection state

  bool notConnected = true;

  // Start GSM shield

  // If your SIM has PIN, pass it as a parameter of begin() in quotes

  while (notConnected) {

    if (gsmAccess.begin(PINNUMBER) == GSM_READY) {

      notConnected = false;

    } else {

      Serial.println("Not connected");

      delay(1000);

    }

  }

  // get modem parameters

  // IMEI, modem unique identifier

  Serial.print("Modem IMEI: ");

  IMEI = modemTest.getIMEI();

  IMEI.replace("\n", "");

  if (IMEI != NULL) {

    Serial.println(IMEI);

  }
}

void loop() {

  // scan for existing networks, displays a list of networks

  Serial.println("Scanning available networks. May take some seconds.");

  Serial.println(scannerNetworks.readNetworks());

  // currently connected carrier

  Serial.print("Current carrier: ");

  Serial.println(scannerNetworks.getCurrentCarrier());

  // returns strength and ber

  // signal strength in 0-31 scale. 31 means power > 51dBm

  // BER is the Bit Error Rate. 0-7 scale. 99=not detectable

  Serial.print("Signal Strength: ");

  Serial.print(scannerNetworks.getSignalStrength());

  Serial.println(" [0-31]");

}
See Also:
Arduino GSM Shield - Complete product description.
Getting started with the GSM Shield - Get everything set up in minutes.
GSM library - Your reference for the GSM Library.
begin()
GSMToolsTestGPRS - Tries to access the internet over GPRS with supplied APN and credentials.
GSMToolsBandManagement - Checks the band currently configured in the modem and allows you to change it.
GSMToolsPinManagement - How to to change or remove the PIN number.
GSMToolsTestModem - Tests to see if the modem of the GSM shield is working correctly.
GSMToolsTestWebServer - A simple web server that replies with nothing, but prints the client's request and the server IP address.
GSMExamplesMakeVoiceCall - How to make a voice call with mic and speaker.
Last revision 2018/08/23 by SM