How to upload a sketch with the Arduino IDE 2.0
In the Arduino environment, we write sketches that can be uploaded to Arduino boards. In this tutorial, we will go through how to select a board connected to your computer, and how to upload a sketch to that board, using the Arduino IDE 2.0.
You can easily download the editor from the Arduino Software page.
You can also follow the downloading and installing the Arduino IDE 2.0 tutorial for more detailed guide on how to install the editor.
Requirements
- Arduino IDE 2.0 installed.
Verify VS Upload
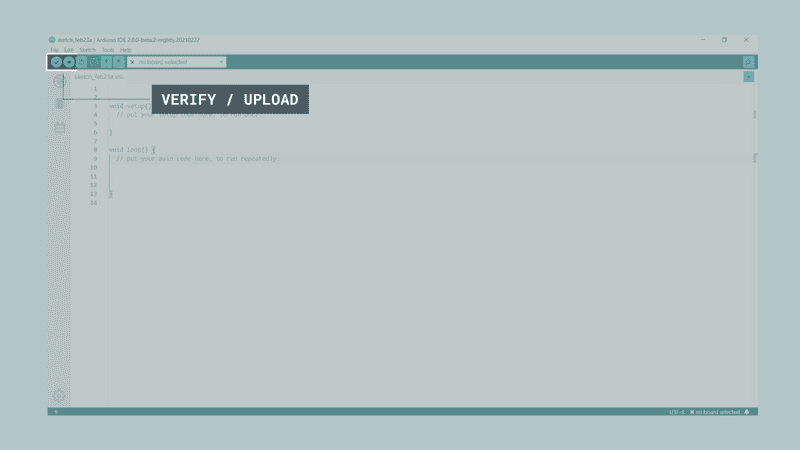
There are two main tools when uploading a sketch to a board: verify and upload. The verify tool simply goes through your sketch, checks for errors and compiles it. The upload tool does the same, but when it finishes compiling the code, it also uploads it to the board.
A good practice is to use the verifying tool before attempting to upload anything. This is a quick way of spotting any errors in your code, so you can fix them before actually uploading the code.
Uploading a sketch
Installing a core is quick and easy, but let's take a look at what we need to do.
Open the Arduino IDE 2.0.
With the editor open, let's take a look at the navigation bar at the top. At the very left, there is a checkmark and an arrow pointing right. The checkmark is used to verify, and the arrow is used to upload.

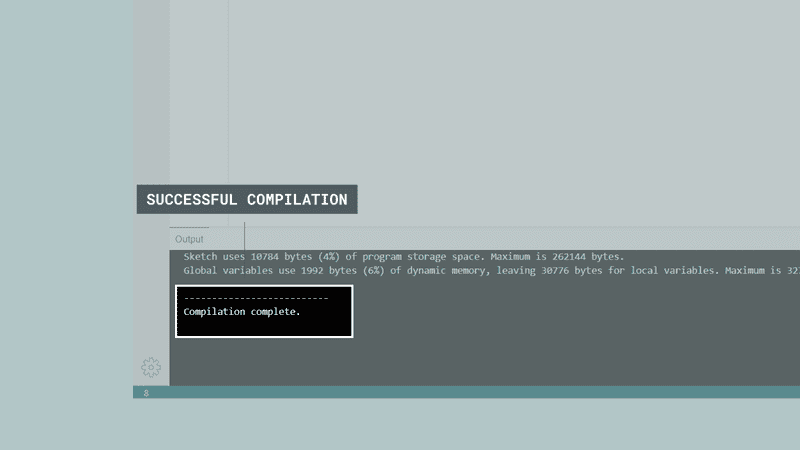
- Click on the verify tool (checkmark). Since we are verifying an empty sketch, we can be sure it is going to compile. After a few seconds, we can see the result of the action in the console (black box in the bottom).

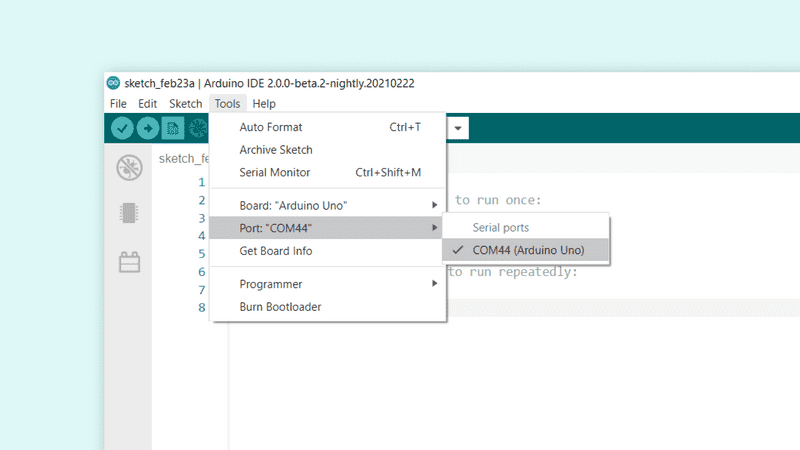
- Now we know that our code is compiled, and that it is working. Now, before we can upload the code to our board, we will first need to select the board that we are using. We can do this by navigating to Tools > Port > {Board}. The board(s) that are connected to your computer should appear here, and we need to select it by clicking it. In this case, our board is displayed as COM44 (Arduino UNO).

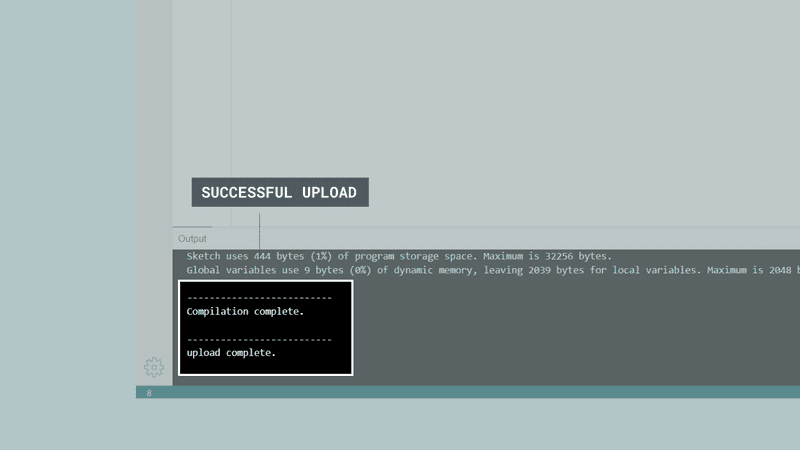
With the board selected, we are good to go! Click on the upload button, and it will start uploading the sketch to the board.
When it is finished, it will notify you in the console log. Of course, sometimes there are some complications when uploading, and these errors will be listed here as well.

Congratulations, you have now uploaded a sketch to your Arduino board!
More tutorials
- Getting started with the Arduino IDE 2.0 (beta)
- Downloading and installing the Arduino IDE 2.0
- How to use the board manager with the Arduino IDE 2.0
- How to install and use a library with the Arduino IDE 2.0
- How to use the Serial Monitor with the Arduino IDE 2.0
- How to use the autocomplete feature with the Arduino IDE 2.0