WiFiNINA Firmware Updater
This tutorial will guide you step by step in the process of updating and checking the WiFi firmware of your Arduino MKR WiFi 1010 board. In order to correctly update the firmware, you must carefully follow each step of this tutorial.
Hardware required
- Arduino MKR WiFi 1010
Circuit
The board should be connected to the USB port of the computer.
Firmware update procedure
First of all, download and install the latest version of the Arduino IDE. Then launch the Arduino IDE and go to Sketch -> Include libraries -> Manage Libraries to install the WiFiNINA library.


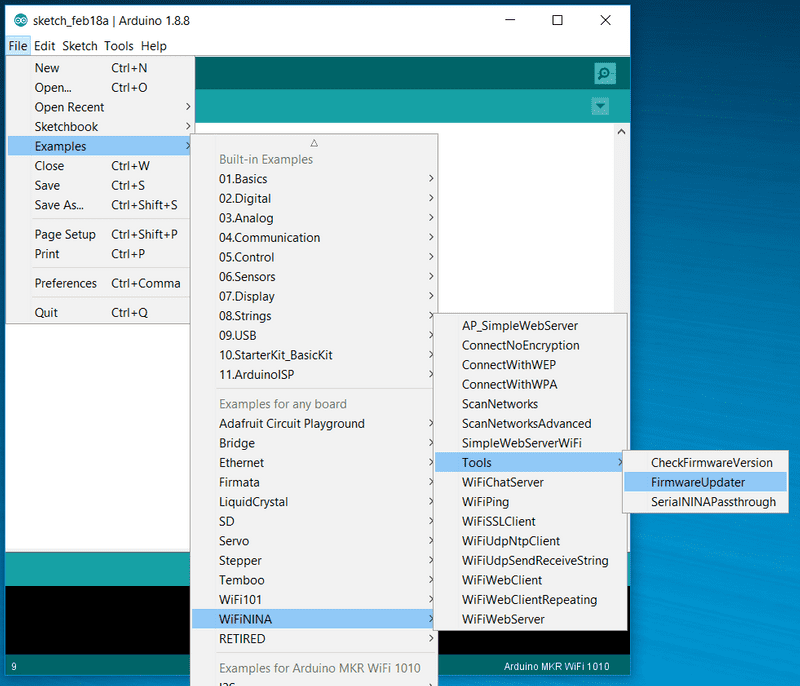
Plug in the board into your computer if you haven't done it yet and from the Tools menu select MKR WiFi 1010 as a board and select the right COM Port. Next open the FirmwareUpdater sketch by going to File -> Examples -> WiFiNINA -> Tools -> FirmwareUpdater.

Upload the sketch onto your MKR WiFi 1010 and close the Serial Monitor if it is open. Now launch the "WiFi 101 / NINA Firmware Updater" from the Tools menu of the IDE.


Select the Serial Port of your board and the version of the firmware you want to install (the latest version should be selected automatically). Then click on Update Firmware and wait for the installation to complete, then close the Firmware Updater.

Check Firmware version
After the installation you can check if you have installed the latest version of the firmware by uploanding the CheckFirmwareVersion sketch onto your board. You can find this sketch by going to File -> Examples -> WiFiNINA -> Tools -> CheckFirmwareVersion.

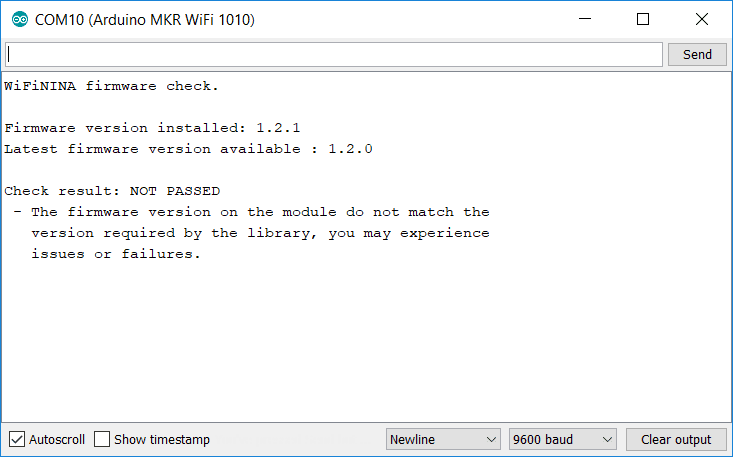
After uploading the sketch, open the Serial Monitor to check the version of the firmware loaded on your board. Don't worry if you see "Check result: NOT PASSED", just check that the firmware version installed is the one you selected in the FirmwareUpdater window.
