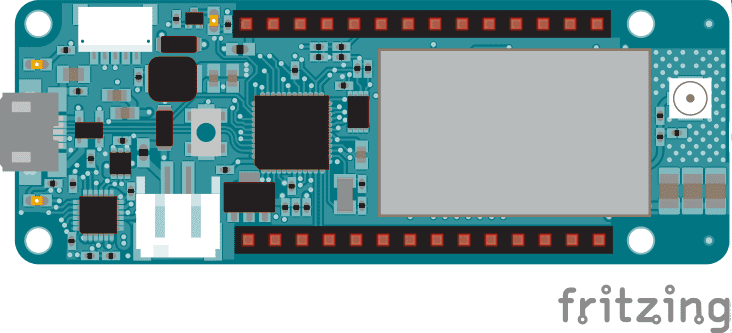
Receive SMS
This sketch waits for an SMS message and prints it to the serial monitor. It uses the GSM library of the Arduino GSM Shield and an active SIM card. To operate, the SIM card doesn't need a data plan.
Hardware Required
antenna
SIM card
Circuit

Code
First, import the MKRGSM library
#include <MKRGSM.h>
SIM cards may have a PIN number that enables their functionality. Define the PIN for your SIM. If your SIM has no PIN, you can leave it blank :
#define PINNUMBER ""
Initialize instances of the classes you're going to use. You're going to need both the GSM and GSM_SMS class.
GSM gsmAccess;

GSM_SMS sms;
Create a char array to hold the number that is sending the message :
char remoteNumber[20];
In setup, open a serial connection to the computer. After opening the connection, send a message indicating the sketch has started.
void setup(){

  Serial.begin(9600);

  Serial.println("SMS Messages Receiver");
Create a local variable to track the connection status. You'll use this to keep the sketch from starting until the SIM is connected to the network :
boolean notConnected = true;Connect to the network by calling gsmAccess.begin(). It takes the SIM card's PIN as an argument. By placing this inside a while() loop, you can continually check the status of the connection. When the modem does connect, gsmAccess() will return GSM_READY. Use this as a flag to set the notConnected variable to true or false. Once connected, the remainder of setup will run.
while(notConnected)

  {

    if(gsmAccess.begin(PINNUMBER)==GSM_READY)

      notConnected = false;

    else

    {

      Serial.println("Not connected");

      delay(1000);

    }

  }
Finish setup with some information to the serial monitor.
Serial.println("GSM initialized.");

  Serial.println("Waiting for messages");
}
SMS messages are received by the modem. SIM cards have some memory space to store incoming SMS. The number of SMS the card can hold can be as few as 10, or as many as 200, depending on the SIM. You should check with your provider to determine how many your SIM can keep in memory.
In loop(), create a variable of type char to temporarily hold characters from any SMS received. Use sms.available() to check for the presence of any messages on the SIM :
void loop()
{

  char c;

  if (sms.available())

  {
If a SMS is available, retrieve the remote sender's number by calling sms.remoteNumber(remoteNumber, 20). the remoteNumber argument is the char array you declared in the beginning of the sketch, it can be no longer than 20 characters. Send this number to the serial monitor.
Serial.println("Message received from:");

    sms.remoteNumber(remoteNumber, 20);

    Serial.println(remoteNumber);
It's possible to delete SMS messages by calling sms.flush(). Using sms.peek() it's possible to identify the message index number, which could be helpful for removal
The code below won't remove any from the SIM, but you could iterate through a for loop, or identify a specific index number to remove, instead of the dummy # used below
if(sms.peek()=='#')

    {

      Serial.println("Discarded SMS");

      sms.flush();

    }
To read a message, use sms.read(). Here, you'll store each character from the message into the variable c and print it out as it gets read.
while(c=sms.read())

      Serial.print(c);
Indicate the message is complete and remove it from memory with sms.flush().
Serial.println("\nEND OF MESSAGE");

    sms.flush();

    Serial.println("MESSAGE DELETED");

  }
Add a brief delay and close the loop.
delay(1000);
}
Once your code is uploaded, open the serial monitor. With a phone, or other SMS enabled service, send a SMS to the number of your SIM. You should see the message print out on screen when it is received.
The complete sketch is below.
/*

 SMS receiver

 This sketch, for the MKR GSM 1400 board, waits for a SMS message

 and displays it through the Serial port.

 Circuit:

 * MKR GSM 1400 board

 * Antenna

 * SIM card that can receive SMS messages

 created 25 Feb 2012

 by Javier Zorzano / TD

*/

// include the GSM library
#include <MKRGSM.h>

#include "arduino_secrets.h"
// Please enter your sensitive data in the Secret tab or arduino_secrets.h
// PIN Number

const char PINNUMBER[] = SECRET_PINNUMBER;

// initialize the library instances

GSM gsmAccess;

GSM_SMS sms;

// Array to hold the number a SMS is retreived from
char senderNumber[20];

void setup() {

  // initialize serial communications and wait for port to open:

  Serial.begin(9600);

  while (!Serial) {

    ; // wait for serial port to connect. Needed for native USB port only

  }

  Serial.println("SMS Messages Receiver");

  // connection state

  bool connected = false;

  // Start GSM connection

  while (!connected) {

    if (gsmAccess.begin(PINNUMBER) == GSM_READY) {

      connected = true;

    } else {

      Serial.println("Not connected");

      delay(1000);

    }

  }

  Serial.println("GSM initialized");

  Serial.println("Waiting for messages");
}

void loop() {

  int c;

  // If there are any SMSs available()

  if (sms.available()) {

    Serial.println("Message received from:");

    // Get remote number

    sms.remoteNumber(senderNumber, 20);

    Serial.println(senderNumber);

    // An example of message disposal

    // Any messages starting with # should be discarded

    if (sms.peek() == '#') {

      Serial.println("Discarded SMS");

      sms.flush();

    }

    // Read message bytes and print them

    while ((c = sms.read()) != -1) {

      Serial.print((char)c);

    }

    Serial.println("\nEND OF MESSAGE");

    // Delete message from modem memory

    sms.flush();

    Serial.println("MESSAGE DELETED");

  }

  delay(1000);

}
See Also
GSM Constructor
GSM_SMS Constructor
beginSMS()
ready()
endSMS()
read()
write()
print()
peek()
flush()
Arduino MKR GSM 1400 - Complete product description.
Getting started with the MKR GSM 1400 - Get everything set up in minutes.
MKRGSM library - Your reference for the GSM Library.
- MKRGSMExamplesMakeVoiceCall - How to make a voice call with mic and speaker.
MKRGSMExamplesReceiveVoiceCall - The call is received and connected, the number that is calling is shown on serial monitor and then the call is hung up.
MKRGSMExamplesSendSMS - How to send an SMS entering number and text through the serial monitor.
MKRGSMExamplesWebServer - A web server that when gets a request from a client sends back the value read on Analog inputs.
MKRGSMExamplesWebClient - Connect to the Arduino.cc home and print the contents on the serial monitor window.
MKRGSMToolsTestGPRS - Tries to access the internet over GPRS with supplied APN and credentials.
Last revision 2017/11/29 by AG