Arduino - ArduinoM0Pro
This is a retired product.
This board is a simple and powerful 32-bit extension of the platform established by the UNO. Learn how to prepare your computer with all you need to start making your own projects.
The Arduino M0 Pro is programmed using the Arduino Software (IDE), our Integrated Development Environment common to all our boards and running both online and offline. For more information on how to get started with the Arduino Software visit the Getting Started page.
Use your Arduino M0 Pro on the Arduino Web IDE
All Arduino boards, including this one, work out-of-the-box on the Arduino Web Editor, you only need to install Arduino Create Agent to get started.
The Arduino Web Editor is hosted online, therefore it will always be up-to-date with the latest features and support for all boards. Follow this simple guide to start coding on the browser and upload your sketches onto your board.
Use your Arduino M0 Pro on the Arduino Desktop IDE
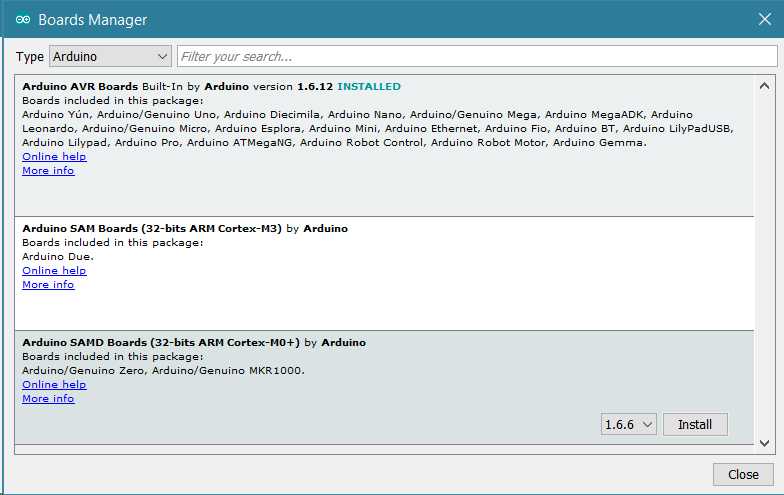
If you want to program your Arduino M0 Pro while offline you need to install the Arduino Desktop IDE and add the Atmel SAMD Core to it. This simple procedure is done selecting Tools menu, then Boards and last Boards Manager, as documented in the Arduino Boards Manager page.
Installing Drivers for the M0 Pro
OSX No driver installation is necessary on OSX. Depending on the version of the OS you're running, you may get a dialog box asking you if you wish to open the "Network Preferences". Click the "Network Preferences..." button, then click "Apply". The M0 Pro will show up as "Not Configured", but it is still working. You can quit the System Preferences.
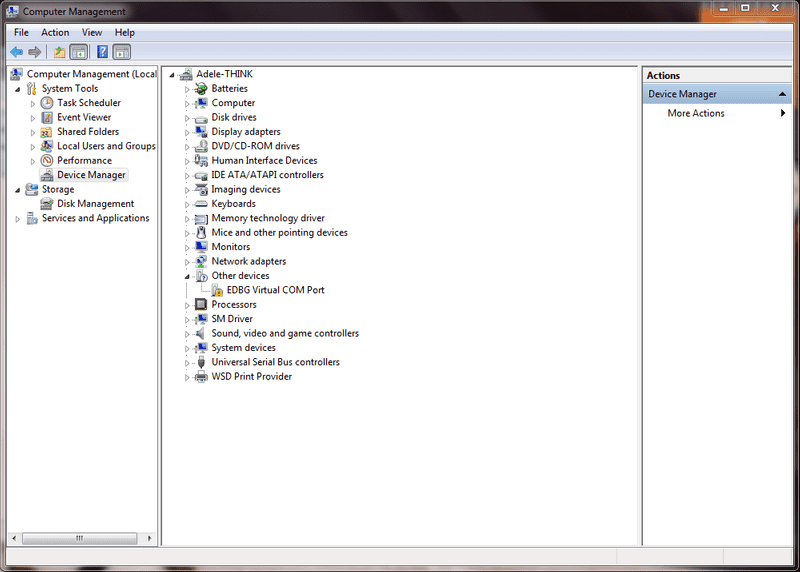
Windows (tested on XP, 7, Vista and 10) Connect the M0 Pro to your computer with a USB cable via the Programming port. Windows should initiate its driver installation process once the board is plugged in, but it won't be able to find the driver on its own. You'll have to tell it where the driver is. Click on the Start Menu and open the Control Panel Navigate to "System and Security". Click on System, and open the Device Manager. Look for the listing named "Ports (COM & LPT)". You should see an open port named "Arduino M0 Pro Prog. Port". Right click on the "Arduino M0 Pro Prog. Port" and choose "Update Driver Software".
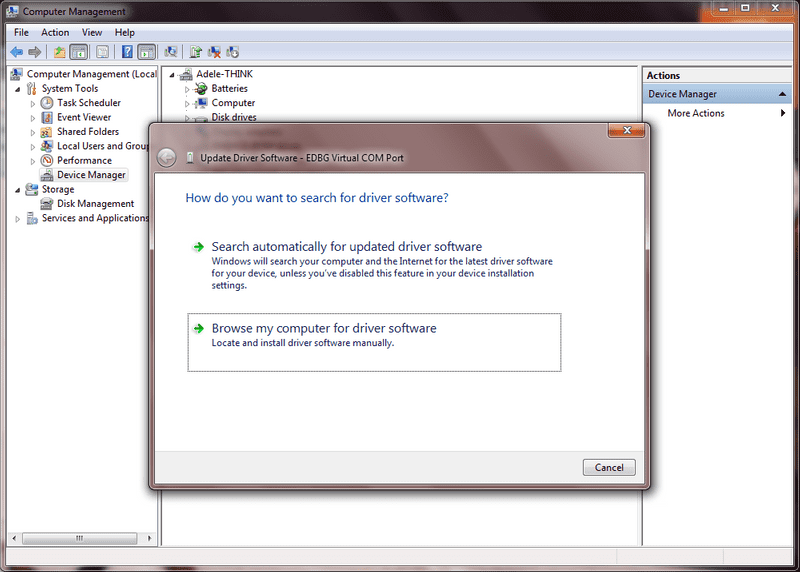
Select the "Browse my computer for Driver software" option.
Navigate to the folder with the Arduino IDE you downloaded and unzipped earlier. Locate and select the "Drivers" folder in the main Arduino folder (not the "FTDI USB Drivers" sub-directory). Press "OK" and "Next" to proceed. If you are prompted with a warning dialog about not passing Windows Logo testing, click "Continue Anyway". Windows now will take over the driver installation.
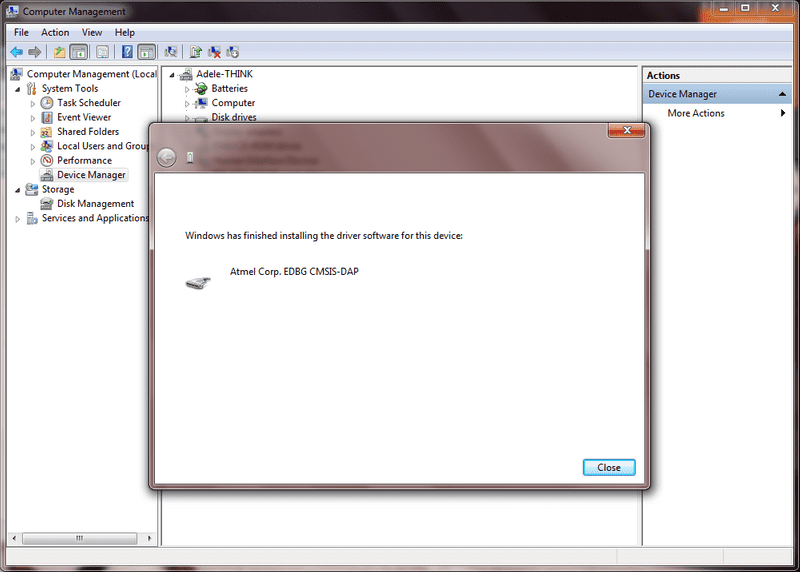
You have installed the driver on your computer. In the Device Manager, you should now see a port listing similar to "Arduino M0 Pro Programming Port (COM4)" If you have multiple COM devices, the M0 Pro will probably be the COM port with the largest number.
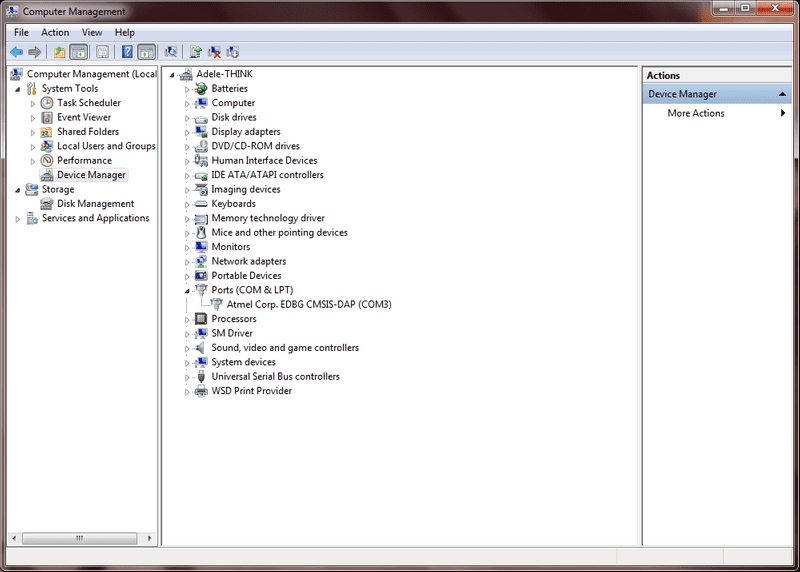
For what concern the Native USB port the procedure is the same, but in the device manager you will see an unknown device.
Linux No driver installation is necessary for Linux.
Open your first sketch
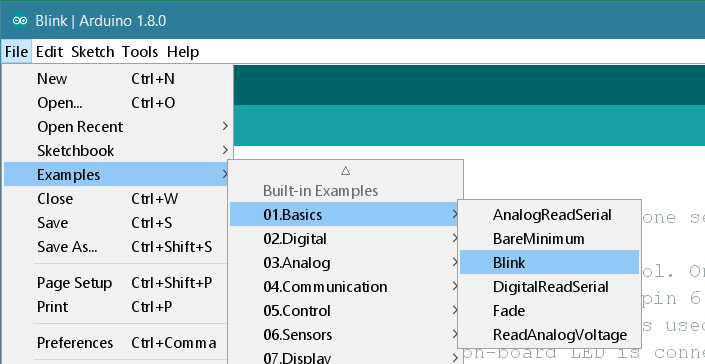
Open the LED blink example sketch: File > Examples >01.Basics > Blink.
Select your board type and port
You'll need to select the entry in the Tools > Board menu that corresponds to your Arduino board.
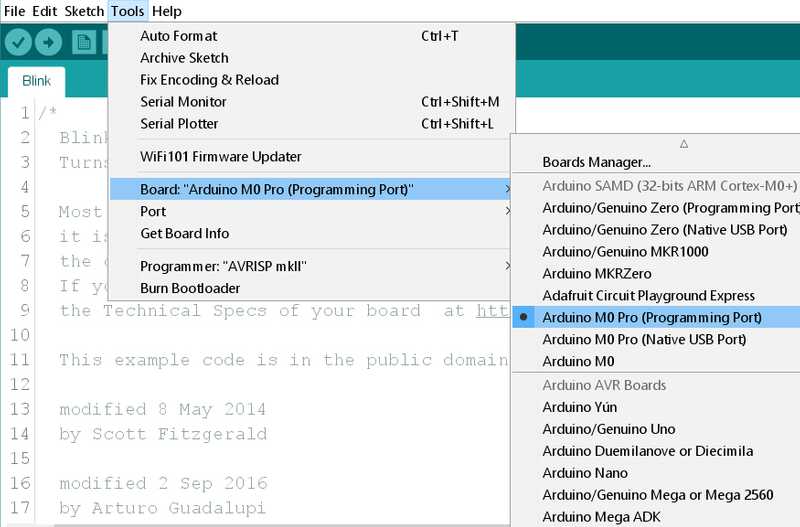
Select the serial device of the board from the Tools | Serial Port menu. This is likely to be COM3 or higher (COM1 and COM2 are usually reserved for hardware serial ports). To find out, you can disconnect your board and re-open the menu; the entry that disappears should be the Arduino board. Reconnect the board and select that serial port.
Upload the program
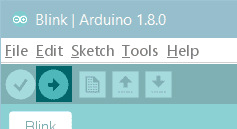
Now, simply click the "Upload" button in the environment. Wait a few seconds - you should see the RX and TX leds on the board flashing. If the upload is successful, the message "Done uploading." will appear in the status bar.
A few seconds after the upload finishes, you should see the on-board LED start to blink (in orange). If it does, congratulations! You've gotten your M0 Pro board up-and-running. If you have problems, please see the troubleshooting suggestions.
Tutorials
Now that you have set up and programmed your M0 Pro board, you may find inspiration in our Project Hub tutorial platform, or have a look to the tutorial pages that explain how to use the various features of your board.
Here a list of tutorials that will help you in making very cool things!
Simple Audio Player RTC Power consumption Adding mores Serial interfaces to SAMD microcontrollers
Please Read...
The microcontroller on the M0 Pro runs at 3.3V, which means that you must never apply more than 3.3V to its inputs or outputs. Care must be taken when connecting sensors and actuators to assure that this is never exceeded. Connecting higher voltages, like the 5V commonly used with the other Arduino boards, will damage the M0 Pro .
Differences from ATMEGA based boards
The M0 Pro has the same footprint as the Arduino Uno, and in general, you can program and use the M0 Pro as you would do with other Arduino boards. There are, however, a few important differences and functional extensions, listed below.
Voltage
The microcontroller on the M0 Pro runs at 3.3V, which means that you must never apply more than 3.3V to its inputs or outputs. When you connect sensors and actuators to the M0 Pro always take care that the maximum voltage limits are not exceeded on the pins. Connecting higher voltages, like the 5V commonly used with the other Arduino boards, will damage the M0 Pro.
The board can take power from the USB connectors or from the DC plug (6-20V).
The M0 Pro has an efficient switching voltage regulator, compliant with the USB host specification. Using the Native port as USB host implies that the board has to provide power to the device, for example a mouse or a keyboard.
Serial ports on the M0 Pro
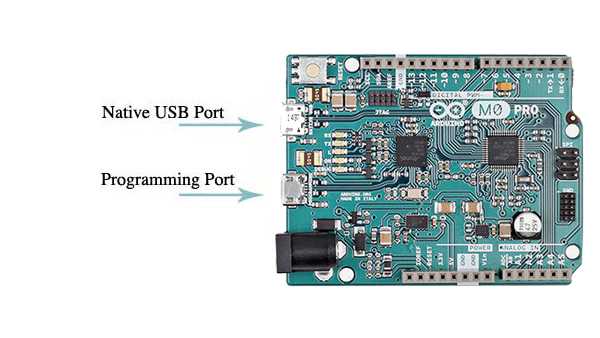
The M0 Pro has two USB ports available. The Native USB port (which supports CDC serial communication using the SerialUSB object) is connected directly to the SAMD21 MCU. The other USB port is the Programming port. It is connected to the ATMEL embedded debugger (EDBG), the onboard programmer and debugger which can also acts as a USB-to-Serial converter. This Programming port is the default for uploading sketches and communicating with the board.
The USB-to-serial converter of the Programming port is connected to the first UART of the SAMD21. It's possible to communicate over this port using the "Serial" object in the Arduino programming language.
The USB connector of the Native port is directly connected to the USB host pins of the SAMD21. Using the Native port enables you to use the M0 Pro as a client USB peripheral (acting as a mouse or a keyboard connected to the computer) or as a USB host device so that devices can be connected to the M0 Pro (like a mouse, keyboard, or an Android phone). This port can also be used as a virtual serial port using the "SerialUSB" object in the Arduino programming language.
Native port
Opening and closing the Native port at the baud rate of 1200bps triggers a "soft erase" procedure: the flash memory is erased and the board is restarted with the bootloader. This procedure is managed by the MCU, so if the MCU is interrupted for any reason, it is likely that the soft erase procedure would fail.
Opening and closing the Native port at a baudrate other than 1200bps will not reset the SAMD21. To use the serial monitor, and see what your sketch does from the beginning, you'll need to add few lines of code inside the setup(). This will ensure the SAMD21 will wait for the SerialUSB port to open before executing the sketch:
while (!Serial) ;Pressing the Reset button on the M0 Pro causes the SAMD21 to reset as well as resetting the USB communication. This interruption means that if the serial monitor is open, it's necessary to close and reopen it to restart the communication.
Programming port
The USB Programming port is connected to the Atmel EDBG, which is an integrated programmer and debugger. Through the Programming port you have the complete control of the SAMD21, for example you can use the EDBG to burn the bootloader or to access to the entire flash content. Beside these advanced features it also behave as an USB-to-serial converter connected to the first serial interface of the SAMD21. Uploading using the Programming port is the safest way to program the SAMD21. For example it works even if the sketch running on the main MCU is not responding.
To communicate serially with the Programming port, use the "Serial" object in the IDE. All existing sketches that use serial communication based on the Uno board should work similarly. On contrary of what happen on the Arduino UNO, opening the Serial Monitor (or any other serial communication) on the M0 Pro doesn't cause the main MCU reset. Pressing the Reset button while communicating over the Programming port doesn't close a USB connection with the computer because only the SAMD21 is reset.
ADC and PWM resolutions
The M0 Pro has the ability to change its analog read and write resolutions (defaults to 10-bits and 8-bits, respectively). It can support up to 12-bit ADC/PWM and 10-bit DAC resolutions. See the analog write resolution and analog read resolution pages for information.
For more details on the Arduino M0 Pro , see the product page.
For the advanced features available on the Arduino M0 Pro , see the advanced features page.
The text of the Arduino getting started guide is licensed under a Creative Commons Attribution-ShareAlike 3.0 License. Code samples in the guide are released into the public domain.